Django deployment installation to Ubuntu 12.04 server
Django is a web framework written in Python and as you may guess everything in Django is also done in Python. Django was developed to simplify the creation of database driven sites and principle of it is “don’t repeat yourself”. Best feature in Django is the fact that it propably is the fastest website framework to create a fully functioning website.
When I developed a website with Django I stumbled upon one step, and that step was the deployment and publishing of Django driven website. There are a good tutorial about deploying Django on the official website and I followed it. Anyway there are alot of things in that tutorial that are not explained and you just need to know.
So here is a full step by step tutorial for deploying Django 1.6 web framework. I have tested this tutorial with Ubuntu 12.04.
Requirements for this tutorial
- Linux knowledge
- Fresh Ubuntu 12.04 installation on a server
- Root access to that server
- Domain
Environment #
In this tutorial the user we are using is root and we will install Django in /srv/ folder. Of course you may use another user and sudo everything, and install in some other directory, but this tutorial does not scale to that. This Django installation is safe and secure and we are going to create a new system user to run mod_WSGI with Apache. Python will be handled by VirtualEnv.
Django 1.6 deployment on Ubuntu 12.04 #
So we start of with updating the system.
apt-get update
apt-get upgrade
Hostname #
Choose here name for your server. Modify SERVERNAME.
echo "SERVERNAME" \> /etc/hostname
hostname \-F /etc/hostname
echo \-e "\\n127.0.0.1 SERVERNAME.local SERVERNAME\\n" \>> /etc/hosts
Install software and dependencies #
Type in the next three lines to install Apache2, Python, VirtualEnv and PIP.
apt\-get \-y install apache2\-mpm\-worker apache2\-dev
apt\-get \-y install python python\-dev python\-setuptools
easy\_install virtualenv virtualenvwrapper pip
Install and enable mod_WSGI #
We will wget the latest mod_wsgi, since the time I checked Ubuntu only offered outdated version. Last commands here will add the mod to Apache2 and disable Apaches default site.
wget http://modwsgi.googlecode.com/files/mod\_wsgi-3.4.tar.gz
tar xvfz mod\_wsgi\-3.4.tar.gz
cd mod\_wsgi\-3.4
./configure
make
make install
echo "LoadModule wsgi\_module /usr/lib/apache2/modules/mod\_wsgi.so" \> /etc/apache2/mods\-available/wsgi.load
a2enmod wsgi
a2dissite default
Install and configure MySQL #
Here we will install MySQL and create database, database user and give privileges for that user to the database. Be sure to modify DATABASENAME with the database name of your choice, DATABASEUSER with the database username of your choice and of course PASSWORD with the password for that database user.
apt\-get \-y install mysql\-server mysql\-client
echo "CREATE DATABASE DATABASENAME;" | mysql \-u root \-p
echo "CREATE USER 'DATABASEUSER'@'localhost' IDENTIFIED BY 'PASSWORD';" | mysql \-u root \-p
echo "GRANT ALL PRIVILEGES ON DATABASENAME.\* TO 'DATABASEUSER'@'localhost';" | mysql \-u root \-p
echo "FLUSH PRIVILEGES;" | mysql \-u root \-p
Install Python environment and Django #
First we create couple of folders for Django and then we will create virtual Python environment with VirtualEnv. Finally we get Django from PIP.
cd /srv/
mkdir \-p my\_project/app my\_project/app/conf/apache
mkdir \-p my\_project/logs my\_project/run/eggs
virtualenv my\_project/venv
/srv/my\_project/venv/bin/pip install django
Start Django project #
Next we’ll start an example Django project. Basically Django is now fully installed but we have to start some project to show all of the complicated steps of deployment. Follow the commands strictly so you will end up in the right directories.
pushd my\_project/app/
/srv/my\_project/venv/bin/python /srv/my\_project/venv/bin/django\-admin.py startproject webapp
popd
mod_WSGI Configuration File #
We need to make a configuration file for mod_WSGI which will be used by Apache2. First create some folders for Django and move into configuration folder.
mkdir \-p my\_project/app/webapp/site\_media
mkdir \-p my\_project/app/templates
cd my\_project/app/conf/apache/
Open nano to create a configuration file
nano django.wsgi
Paste the following code into the editor and save it.
import os
import sys
root\_path \= os.path.abspath(os.path.join(os.path.dirname(\_\_file\_\_), '..', '..', '..'))
sys.path.insert(0, os.path.abspath(os.path.join(root\_path, 'venv/lib/python2.7/site-packages/')))
sys.path.insert(0, os.path.abspath(os.path.join(root\_path, 'app')))
sys.path.insert(0, os.path.abspath(os.path.join(root\_path, 'app', 'webapp')))
os.environ\['DJANGO\_SETTINGS\_MODULE'\] \= 'webapp.settings'
import django.core.handlers.wsgi
application \= django.core.handlers.wsgi.WSGIHandler()
Create system user #
Now we will create a system to run Apaches’ mod_WSGI process. Make sure to edit USERNAME. Last command will set a shell to that user.
useradd \--system \--no\-create\-home \--home\-dir /srv/my\_project/ \--user\-group USERNAME
chsh \-s /bin/bash USERNAME
Apache Site Configuration #
I have created an example site configuration which works on normal network environments. Open nano to the site file with the following command. Remember to edit DOMAIN with your own domain name.
nano /etc/apache2/sites\-available/DOMAIN
Paste the following to the editor and edit DOMAIN with your own domain name and USER with the username we just created a while ago.
ServerAdmin root@DOMAIN
ServerName DOMAIN
Alias /site\_media/ /srv/my\_project/app/webapp/site\_media/
Alias /static/ /srv/my\_project/venv/lib/python2.7/site\-packages/django/contrib/admin/static/
Alias /robots.txt /srv/my\_project/app/webapp/site\_media/robots.txt
Alias /favicon.ico /srv/my\_project/app/webapp/site\_media/favicon.ico
CustomLog "|/usr/sbin/rotatelogs /srv/my\_project/logs/access.log.%Y%m%d-%H%M%S 5M" combined
ErrorLog "|/usr/sbin/rotatelogs /srv/my\_project/logs/error.log.%Y%m%d-%H%M%S 5M"
LogLevel warn
WSGIDaemonProcess DOMAIN user\=USER group\=USER processes\=1 threads\=15 maximum\-requests\=10000 python\-path\=/srv/my\_project/venv/lib/python2.7/site\-packages python\-eggs\=/srv/my\_project/run/eggs
WSGIProcessGroup DOMAIN
WSGIScriptAlias / /srv/my\_project/app/conf/apache/django.wsgi
Order deny,allow
Allow from all
Options \-Indexes FollowSymLinks
Order deny,allow
Allow from all
Now we just need to activate that configuration to Apache. Edit DOMAIN again to your own.
a2ensite DOMAIN
MySQL dependency to Python #
Next we need to install MySQL-module for our Python environment
apt\-get build\-dep python\-mysqldb
/srv/my\_project/venv/bin/pip install MySQL\-python
Configuration of Django #
Move to project folder and edit settings.py file.
cd ../../
cd webapp/webapp/
nano settings.py
There you need to edit your own specific MySQL details.
DATABASES \= {
  'default': {
    'ENGINE': 'django.db.backends.mysql',
    'NAME': 'DATABASENAME',
    'USER': 'DATABASEUSER',
    'PASSWORD': 'DATABASEPASSWORD',
  }
}
Also add these lines to the settings file MEDIA_ROOT = '/srv/my_project/app/webapp/site_media/' and TEMPLATE_DIRS = '/srv/my_project/app/templates/',
Set permissions and restart Apache #
Now we have to set permissions for the user we made while ago. Edit USERNAME to your own.
chown \-R USERNAME:USERNAME /srv/my\_project/
We have done everything to deploy Django so, all we need to do in order to get Django working is to restart Apache webserver.
service apache2 restart
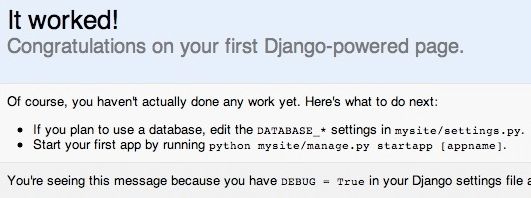
You should see something like this on your domain website.
Now you have completely installed Django framework on a working Ubuntu server installation. Deployment is done to the part where we need here an actual website.
I hope this tutorial has helped and please leave a comment or contact me from the about page, if you have any questions.
Django apps and actual website #
If you are new to Django and want to build fully functional website. I suggest you start from the official tutorial which I think is one the best learning tutorials around web frameworks.